In Haydee, a total of 23 achievements can be earned via the accomplishment of specific tasks throughout the game. Although they can vary from simple item retrieval to speed-running under a strict time limit - all achievements, with a few notable exceptions, show perseverance and knowledge of the game that many players do not have.
See the Endings page for their respective achievements.
Item achievements[]
These achievements are comparatively simple, and most can be earned incidentally throughout the course of the game; Haydee simply has to locate and pickup a specific key item.
You got it![]
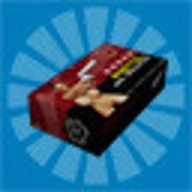
Find the tutorial section ammo.[]
A button, accessed through a vent at the bottom of the pit containing the second white keycard, must first be activated to unlock the door to a platforming section in the tutorial; the entrance to it can be found through another vent in the save room. Haydee must carefully make her way down to the last platform, where the stack of 12 Pistol Rounds is found.
Gordon?[]

Find the Crowbar.[]
The Crowbar is found on the Black Zone's ground floor, in the room directly ahead of its entrance. It will be found on a dead Haydee body, with her killer standing unaware in front of her and the door against its back. The floor does not need to be powered in order to obtain this item, and instead Haydee is free collect the crowbar very early into the game without any extensive preparation, although she should first retrieve the Night Visor to successfully navigate the otherwise pitch-black area.
Minesweeper[]

Find the Pliers.[]
The Pliers are found in the Red Zone in a storage area at the top of a large shaft, and are accessed by climbing up a stack of crates and jumping the gap. A Walker and a Slasher wait around each corner inside the room once entering it, making caution advisable. The pliers will be found on the right side, on one of the bodies in a pile of Haydee corpses, with two mines hidden behind them.
High Power[]

Find the Magnum.[]
The Magnum can be found in a locked crate deep in the Green Zone, behind a locked door opened by a yellow key card. The card can be looted off a dead Haydee, though the Magnum itself will be much further into the area; behind several doors and enemies as opposed to immediately across from it as with most yellow cards.
Run and Gun[]


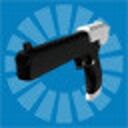
Find the SMG.[]
The Sub-Machine Gun can be found through an easily overlooked passageway underneath the elevator connecting the Red Zone to the White Zone. To access it, a Remote Device must be placed on the inner elevator control button and activated while Haydee is not standing on the elevator floor. This will reveal the elevator shaft, and allow one to drop off the ledge and grab onto the opening into the passageway. The Sub-Machine Gun will be found in the hands of a dead Haydee body, and a door can be opened to allow access back to the Red Zone.
Full House[]


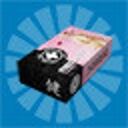
Find the useless card.[]
The Pink Keycard can be found in the Blue Zone, through a vent above a tunnel filled with water. All three Remote Devices are needed to reach the card, as four separate buttons must be activated simultaneously to open the locked door blocking Haydee's access to it; she must be careful not to leave any of the Devices behind otherwise it may be impossible to earn this achievement until they are retrieved.
Statistic Achievements[]
These achievements are earned over the course of an entire playthrough of Haydee; although multiple can be earned at once, certain statistics cannot be reset or brought back into acceptable bounds without reverting to an older save or completely starting the game again.
Note: Pressing the 'F1' key will display some of the statistics related to these achievements, which is useful for keeping track of progress towards them.
Old School[]


Complete the game with the default Pistol only.[]
The Pistol, although dependable and versatile, is a comparatively unforgiving weapon in combat. Headshots are even more of a necessity, and Slashers will be noticeably more difficult to take down. However, Pistol ammunition is considerably more abundant and has much lower recoil than the other weapons; enough practicing with the weapon can allow the Pistol to be equally as effective as the SMG in almost all situations. Importantly, only damaging an enemy with the Magnum or SMG prevents this achievement from being earned, so Proximity Mines can and should be used to deal with groups of enemies where the Pistol alone would struggle.
Genocide[]


Kill all the bots you encountered.[]
The Genocide achievement is very simple to earn, as Haydee should generally attempt to destroy all enemies she encounters regardless; however she will have to purposely open all doors in the Yellow Zone to release the various bots stored behind them; additionally, she must drop mines on the two Slashers hiding in its trap pit, which are otherwise difficult to successfully kill. However, Haydee must never enter the corridor in the Green Zone containing multiple obstructed enemies; although they are indestructible, entering the room still counts as encountering them - preventing the achievement from being earned.
Mercy[]


Complete the game having killed no more than 50 bots.[]
As many areas in the game use narrow corridors and Haydee must revisit locations frequently, avoiding enemies can be difficult and the 50 bot-limit can be very restrictive; Medkits become more important than ammunition as Haydee may be forced to take hits while retrieving items or toggling buttons. It is best to disregard searching for ammo completely, although it may be useful to carry a fully-loaded SMG through particularly dangerous areas. Haydee can still stun Slashers with no penalty - however this can only ever be done once per bot, as another headshot will always instantly destroy them.
God Mode[]

Complete the game with no damage recieved.[]
Haydee must be extremely careful, quick-to-react and accurate when attempting to earn this achievement; unlike all others, she can only either fail or succeed completely. Any one of the many sources of damage only needs to scratch Haydee to force her to reload or even restart. The opposite to the Mercy achievement, Haydee has no use for Medkits or even the Armoured Vest, and should take every opportunity to fill her inventory with munitions - even carrying around a second, loaded sidearm can save Haydee from an unexpected ambush if caught while reloading her primary. Proximity Mines can be used to clear groups of enemies without even the risk of taking damage, however the potential for self-injury from the explosion can make this inadvisable at times.
Bullseye[]


Complete the game with 80% headshots.[]
Even more so than the Genocide achievement, Bullseye can be completed with almost no extra effort on the player's part; scoring headshots is ordinarily a skill required for efficient playthroughs. However, it is important to note that the Pliers can be a more valuable item, as shooting a mine from afar counts against the headshots percentage; additionally, the extra mines gained from successful defuses can be very useful, as Proximity Mines can be placed and triggered without affecting the headshot percentage at all. Also, it is wise to use the default Pistol and Magnum; the high-recoil and automatic nature of the SMG can make successive headshots difficult, even when firing on Walkers.
Runner[]


Complete the game in one hour.[]
Advanced planning and knowledge of Haydee's layout is necessary to even attempt this achievement; saving is time consuming and simply following the standard pathways around the facility takes too long to earn it. Instead, creative thinking is required to skip the many slow climbing sequences and puzzles should be memorised until they can be done in the minimum amount of button presses. Most Walkers should simply be ignored and Slashers must be dispatched as quick as possible, without concern for ammunition usage or health loss.
Reckless[]


Complete the game without saving.[]
Potentially the most time-consuming achievement to earn, Haydee cannot save at any point at all; dying forces a new game to be started, and as such Haydee must be able to remember the precise location of every potentially lethal hazard in the game - trial-and-error is not an option at all. Medkits and ammunition must be equally prioritised over all else, and it is wise to separate combat from exploration as much as possible - only after completely clearing an area of enemies should Haydee attempt to search for items and traverse passageways without a fully supply of defensive gear.
Misc. Achievements[]
These achievements have unique requirements and are awarded for completing specific tasks in Haydee.
Welcome to... Haydee![]


Find your death in Haydee.[]
Awarded for dying your very first time.
Moron[]


Die in the same room 3 times in a row.[]
Awarded for dying three times in the same room after reloading/restarting.
Not Bad[]


Complete the tutorial section.[]
The tutorial section does not have to be completed 100%; Haydee can miss important items and still earn the achievement, so long as she exits the White Zone at some point.
Havoc![]


Create Havoc.[]
In the Blue Zone, a small letter-based puzzle must be completed to obtain the Orange Keycard. Spelling out 'Havoc' using the marked floor tiles will earn this achievement; its name, description and icon are otherwise seemingly irrelevant to it. 'Haydee' can still be entered to progress the game normally afterwards.
Interracial[]


Find the secret room.[]
Immediately before the Trap Pit in the Yellow Zone is a vent above a small climbing section. Jumping into the vent will lead Haydee into the Secret Room itself, where another Haydee unit and a Walker embrace eachother. A single Medkit can be taken off the Haydee's body before returning to the main game.